Every time they are used, dental instruments must be cared for properly. This way, for as long as possible, they can function as intended. High quality dental instruments are, indeed, quite an investment, so it's important to use an efficient and safe process when sterilizing your dental instruments.
Whereas money is important, there's far more at stake than just cost. In the war against infection, as a dentist, you are on the front lines! To protect yourself, your patients, and your instruments, one of the most effective and important tools is the process through which you sterilize and clean your instruments.
There are guidelines in place, published by the CDC, which, today, are the gold standard in dental offices. For the prevention of infection transmission, instrument processing plays a central role in these guidelines. This is no wonder because the instruments a dentist uses penetrate and/or come into contact with each patient's soft tissues. Infection can take hold quickly if your instruments are harboring microbes.
Let's look at some best practices when it comes to the process of dental instrument cleaning, sanitizing, and sterilizing.
Protecting Personnel
As you clean and organize instruments, to protect yourself from microbial contamination, PPE (personal protective equipment) should be used. Because accidents can and do happen, when cleaning dental instruments, utility gloves are particularly important. They should be chemical resistant, puncture resistant, and capable of being disinfected.
Instrument Pre-Soak
Depending on how busy your practice is, right after you use them, you may not have time to clean your instruments. Why is this an issue? Think about the dirty dishes you might leave on a kitchen counter overnight. What happens to the debris on them? It hardens. The same thing can happen to dental instruments. Caked on, hardened debris is harder to clean off than debris that is moist, as with the case of soaked instruments. One effective option is to spray on enzymatic spray gel until you can clean them.
Before You Steam It, Clean It
The full surface of an instrument may not be contacted by the superheated steam if, before they go into the autoclave, debris remains on the instruments. Before you sterilize the tools, any visible material should be cleaned off of them. Here are some methods of doing just that:
- Manual scrubbing
- Automated instrument washers
- Ultrasonic cleaning
Instrument Drying
Dry your instruments thoroughly before sterilization in an autoclave. Only the amount of moisture a sterilizer introduces to instruments will be removed by the sterilizer. They will emerge wet if you put them in a sterilizer while wet. The packaging will also get wet as a result (next step).
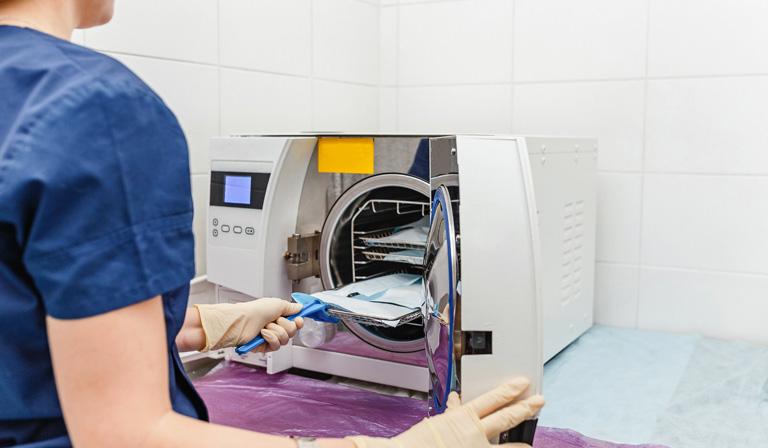
Instrument Packaging
Packaging instruments with pouches or wraps is the last step prior to placing them in the sterilizer. To prevent exposure to air, the package should be sealed when you take your instruments out of the sterilizer. Without compromising either strength or softness, be sure to choose an autoclave wrap that can withstand the harsh steam sterilization conditions and one that allows penetration of the sterilization agent.
Carefully Load Your Instruments
Rather than squeezing too many instruments into an autoclave cycle, resist the over-stuffing temptation. One of the main reasons for failed sterilizations is overloaded sterilizers. Sufficient sterilization agents may not get to each instrument if they are packed too closely together.
Looking for Dental Instruments? Turn to ProNorth Medical Corporation
Shop ProNorth Medical Corporation for a wide selection of dental instruments. But wait, that's not all! We also carry a wide variety of sutures, a number of PPE products, as well as medical supplies, and veterinary products. If you'd like to save money – which a lot of people and businesses are trying to do these days – check out our current clearance items here.

Leave a comment
This site is protected by hCaptcha and the hCaptcha Privacy Policy and Terms of Service apply.